How to Crochet a Simple Red Camellia Bandana for Beginners
How to Crochet a Simple Red Camellia Bandana for Beginners
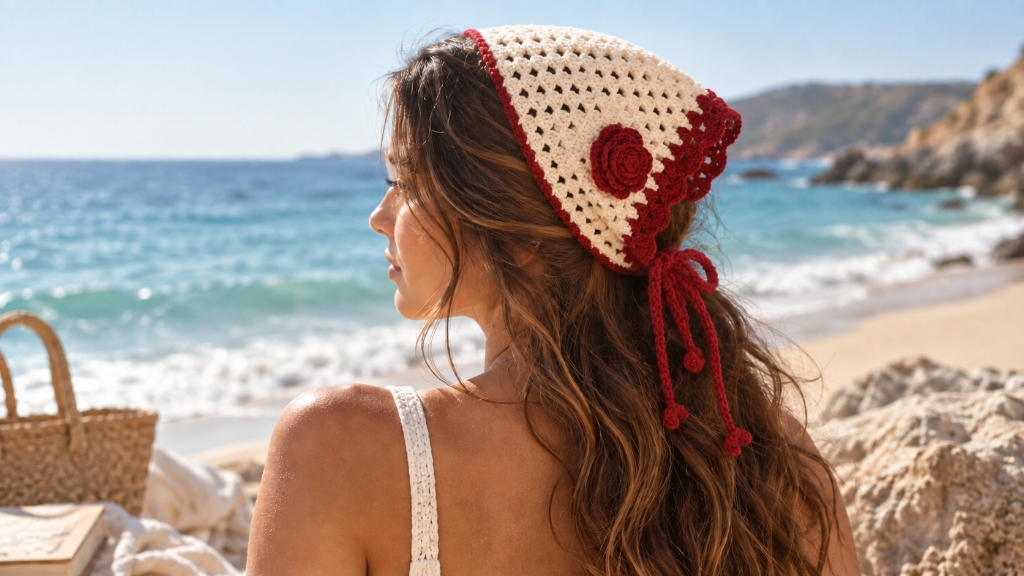
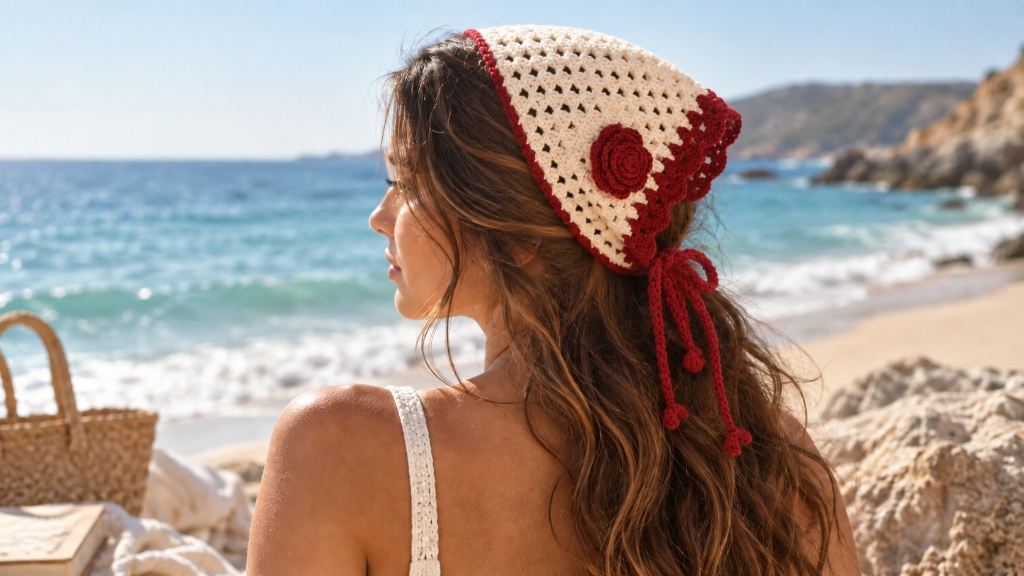
Learn how to crochet a stylish, breathable red camellia triangle bandana with this beginner-friendly step-by-step tutorial. This project is relaxing, quick to work up, and features classic cream granny mesh, delicate scalloped red trim, a handmade camellia blossom, and flower-tipped ties for summer days, music festivals, or cozy cottagecore aesthetics.
•
Updated: September 2026
•
Reading Time: 8 min
📋 Quick Project Overview
🧶 Materials You’ll Need
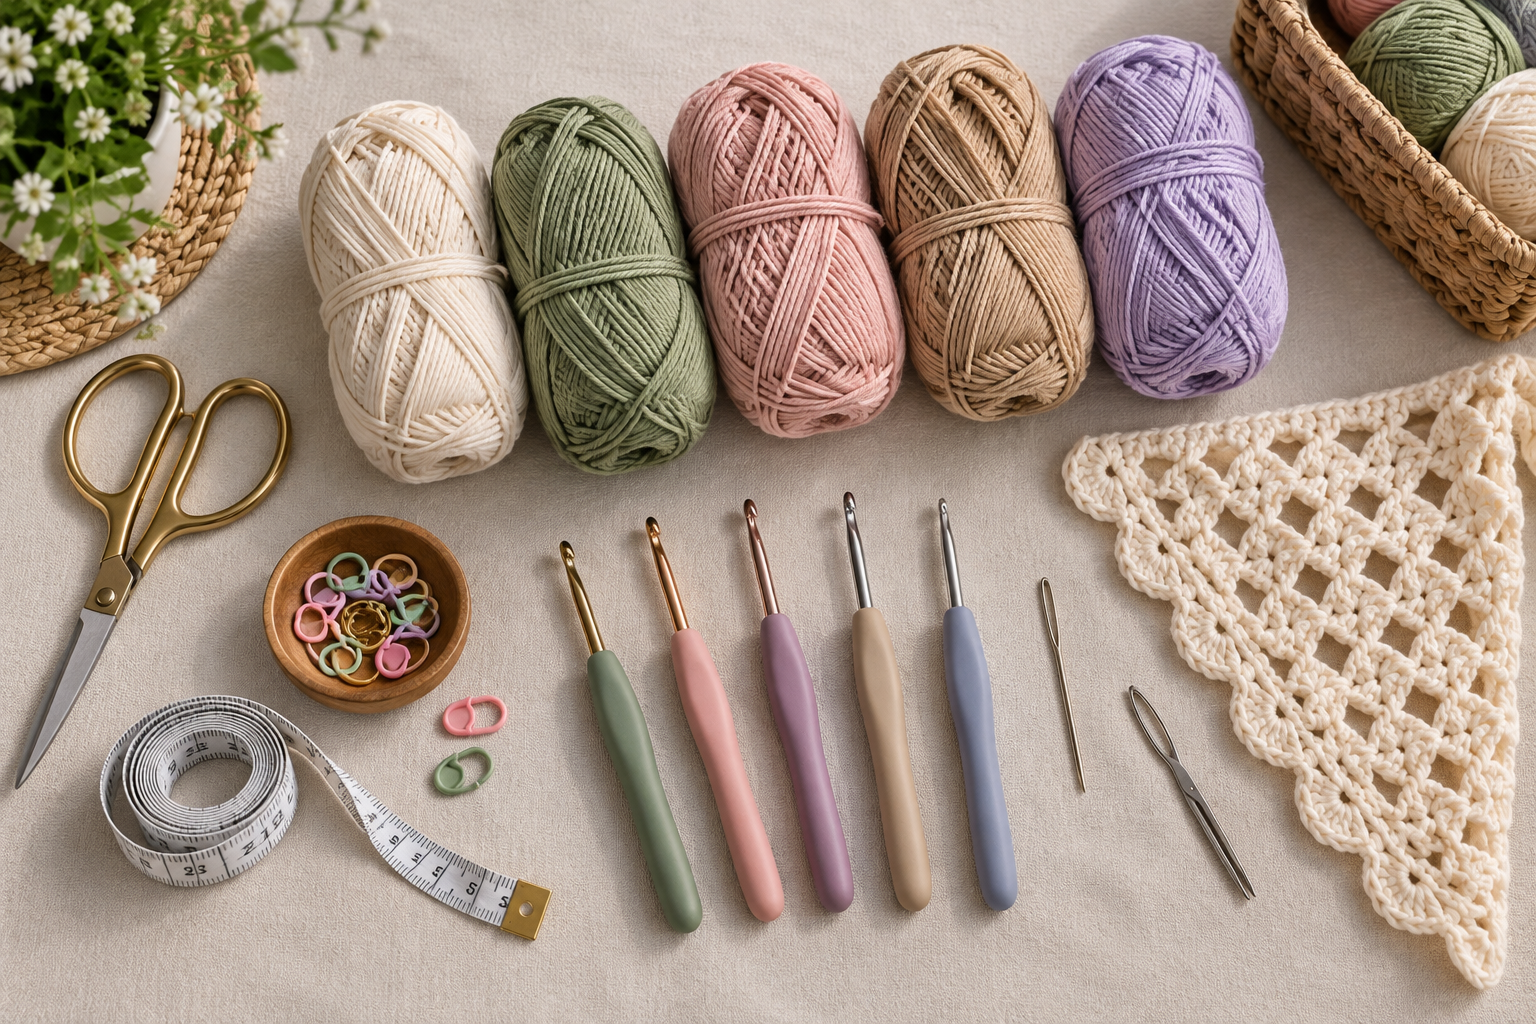
One of the best things about making a crochet bandana is that it requires very little yarn and only basic notions. Here is the complete checklist of tools and supplies needed for this project:
-
✓
Yarn: 1 Skein (approx. 100g / 180 yds) of 100% Cotton or Cotton blend yarn. -
✓
Crochet Hook: 4.0 mm (US G/6) ergonomic aluminum hook. -
✓
Scissors: Precision yarn snips or sharp craft scissors. -
✓
Measuring Tape: Soft retractable measuring tape for sizing. -
✓
Tapestry Needle: Blunt-end yarn needle for weaving in tails. -
✓
Stitch Markers: 2 locking markers to pinpoint the center increase apex.
🌿 Best Yarn for a Crochet Bandana
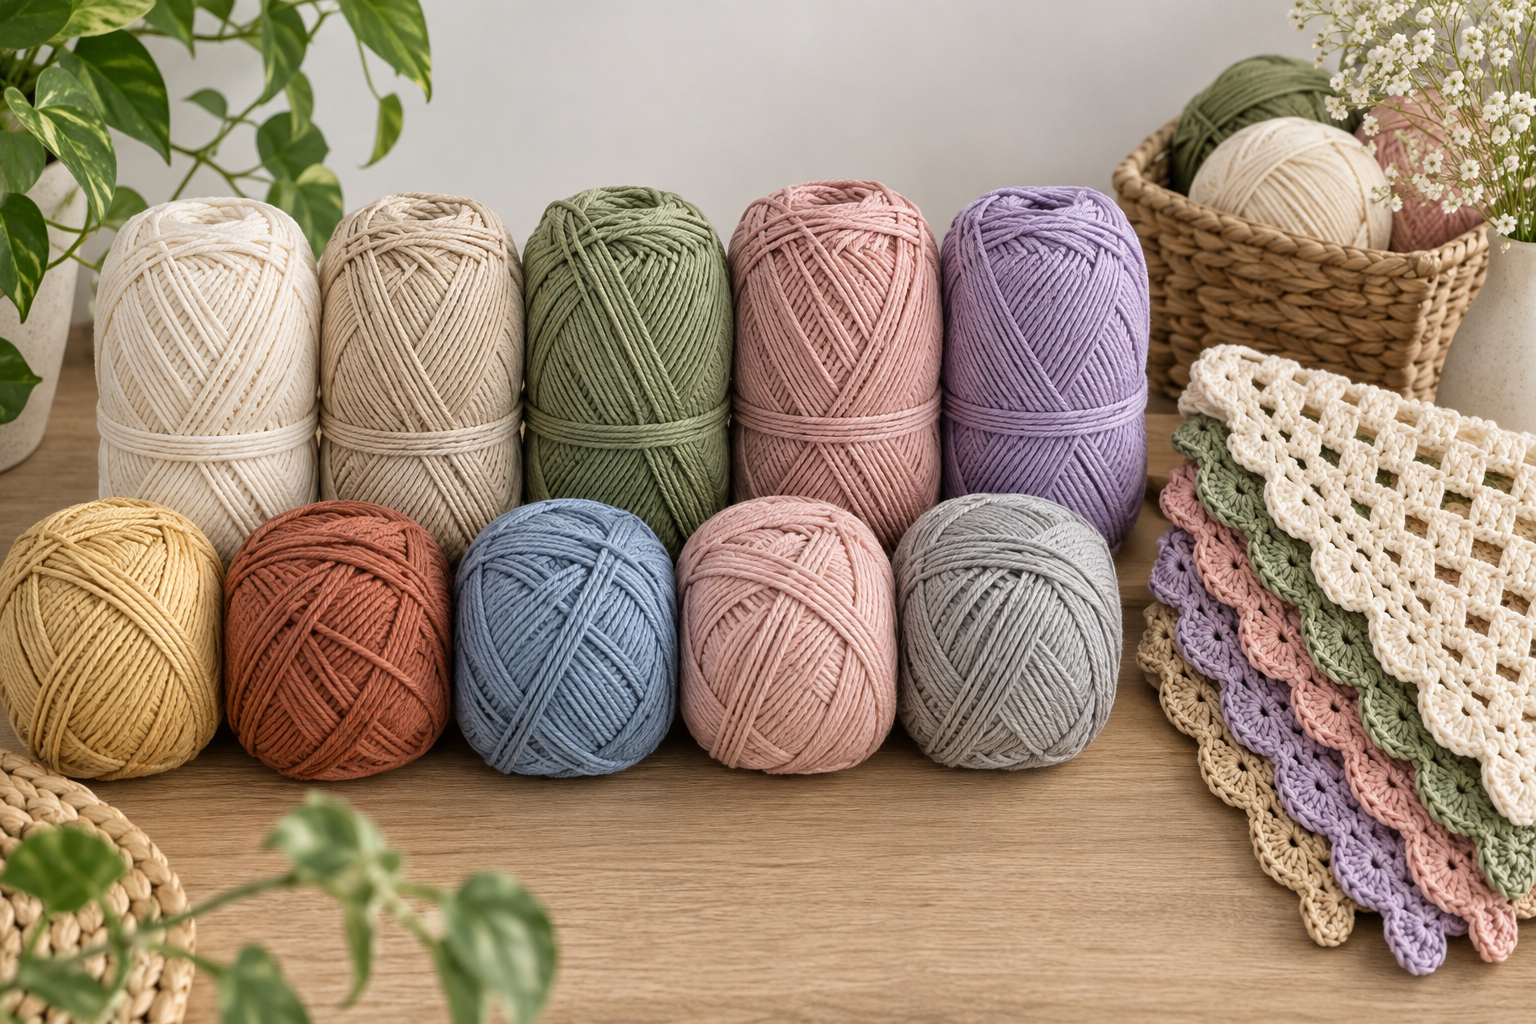
Choosing the correct fiber is crucial when crocheting hair accessories and headwear. Because the bandana rests directly against your forehead, hair, and neck, the yarn must be lightweight, breathable, and non-irritating.
🌱 100% Cotton & Mercerized Cotton
The gold standard for bandanas. Cotton offers exceptional breathability, holds crisp lace openwork, and absorbs moisture without becoming itchy in hot weather.
🎋 Cotton-Bamboo & Linen Blends
Bamboo provides an ultra-soft, silky hand feel with fluid drape, while linen adds natural texture and vintage rustic appeal that softens beautifully after every wash.
⚠️ Yarns to Avoid
Avoid heavy 100% scratchy acrylics, bulky chenille yarns, or coarse untreated sheep wool, as they trap excessive body heat and can cause static or hair tangles.
🪡 Beginner Crochet Stitches Used
This bandana pattern uses classic beginner crochet stitches arranged into a relaxed granny-stitch mesh. Before starting, review these fundamental stitches:
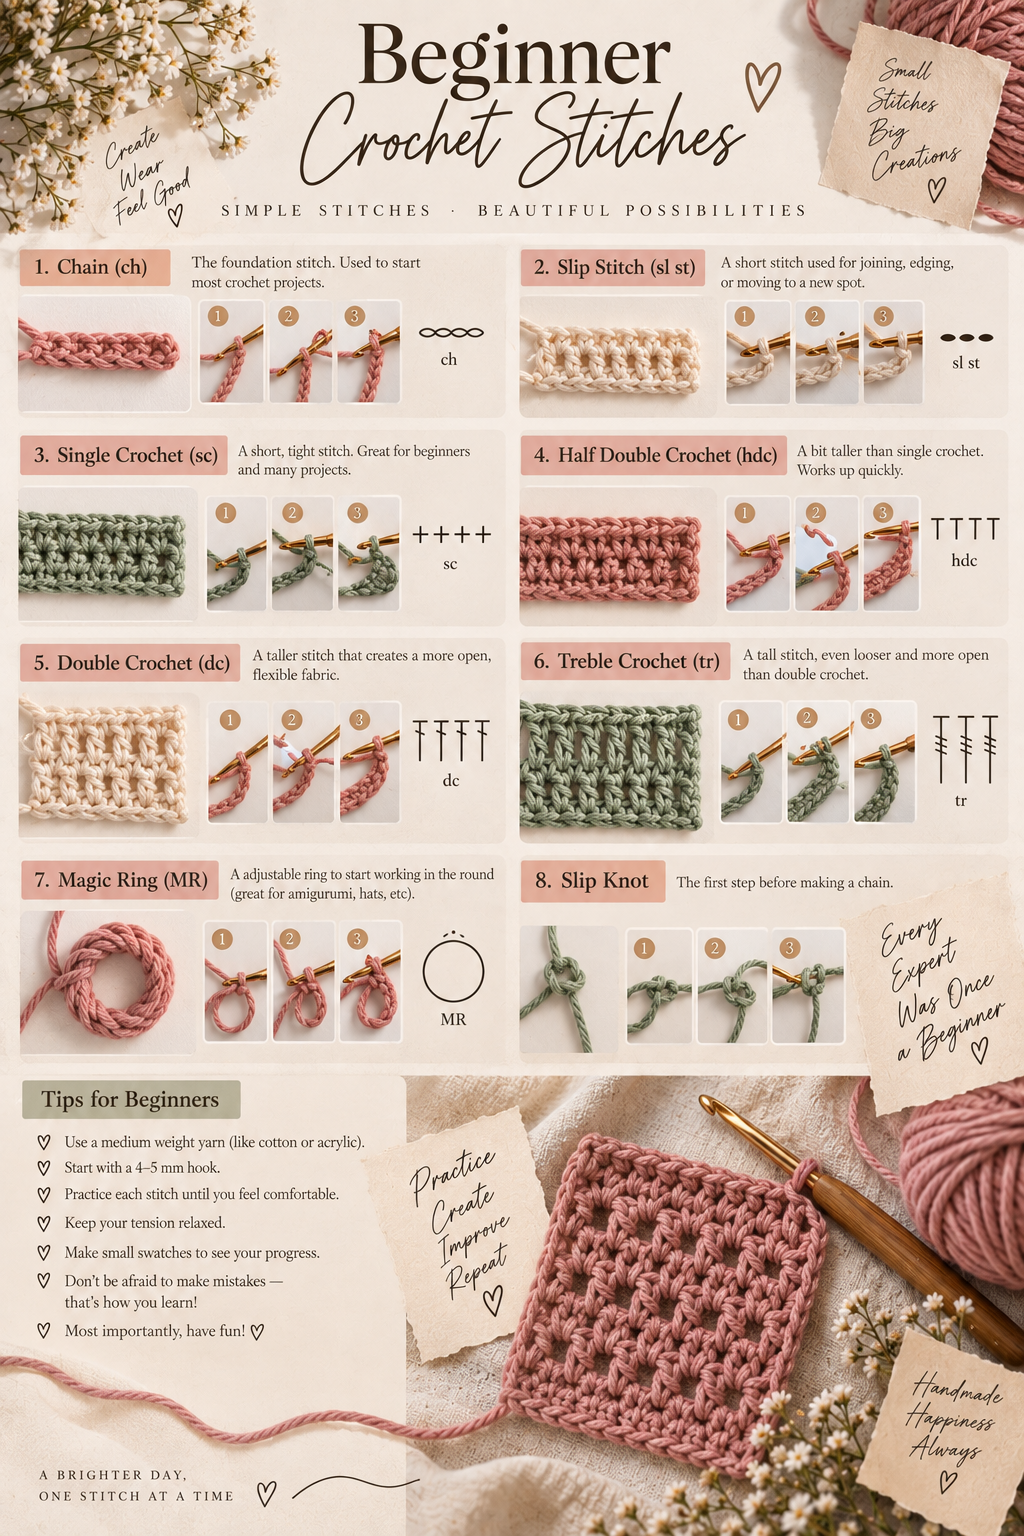
Yarn over, pull through loop on hook. Used to establish turning heights and create open lace eyelets between double crochet groups.
Insert hook into stitch, yarn over, pull up loop, yarn over, pull through both loops. Used to create clean, sturdy borders and secure ties.
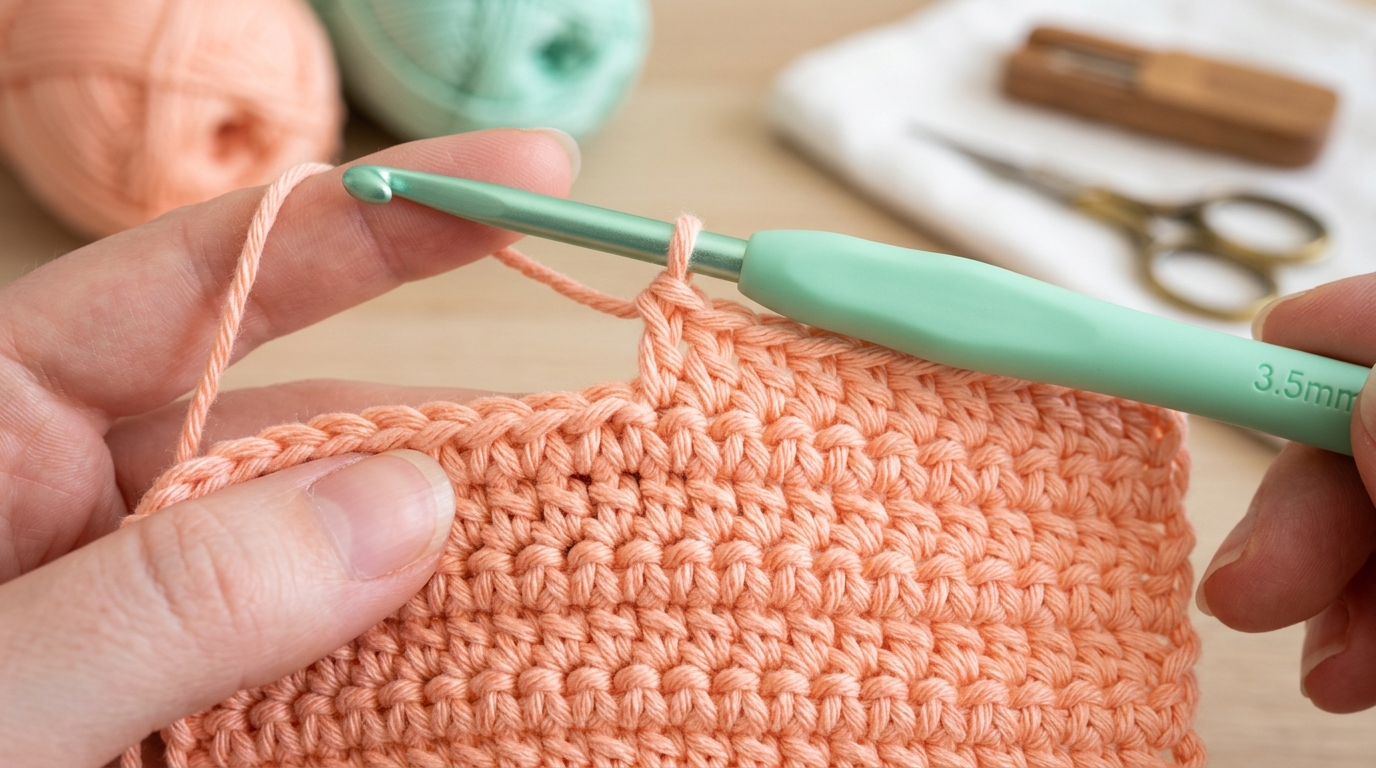
Yarn over, insert hook, pull up loop, [YO, pull through 2] twice. The primary stitch providing height and airy drape throughout the triangle body.
Insert hook, yarn over, draw directly through stitch and loop on hook. Ideal for seamless transitions, edge reinforcement, and securing ends.
Watch the Step-by-Step Video Tutorial
High-Definition Visual Stitch Guide • Left & Right Hand Friendly
Full Video Tutorial (6:28)
Prefer to crochet along in real time? Watch our comprehensive visual walkthrough below demonstrating the magic ring foundation, granny cluster rhythm, color changes, flower ties, and scalloped border:
Create Your Foundation Chain
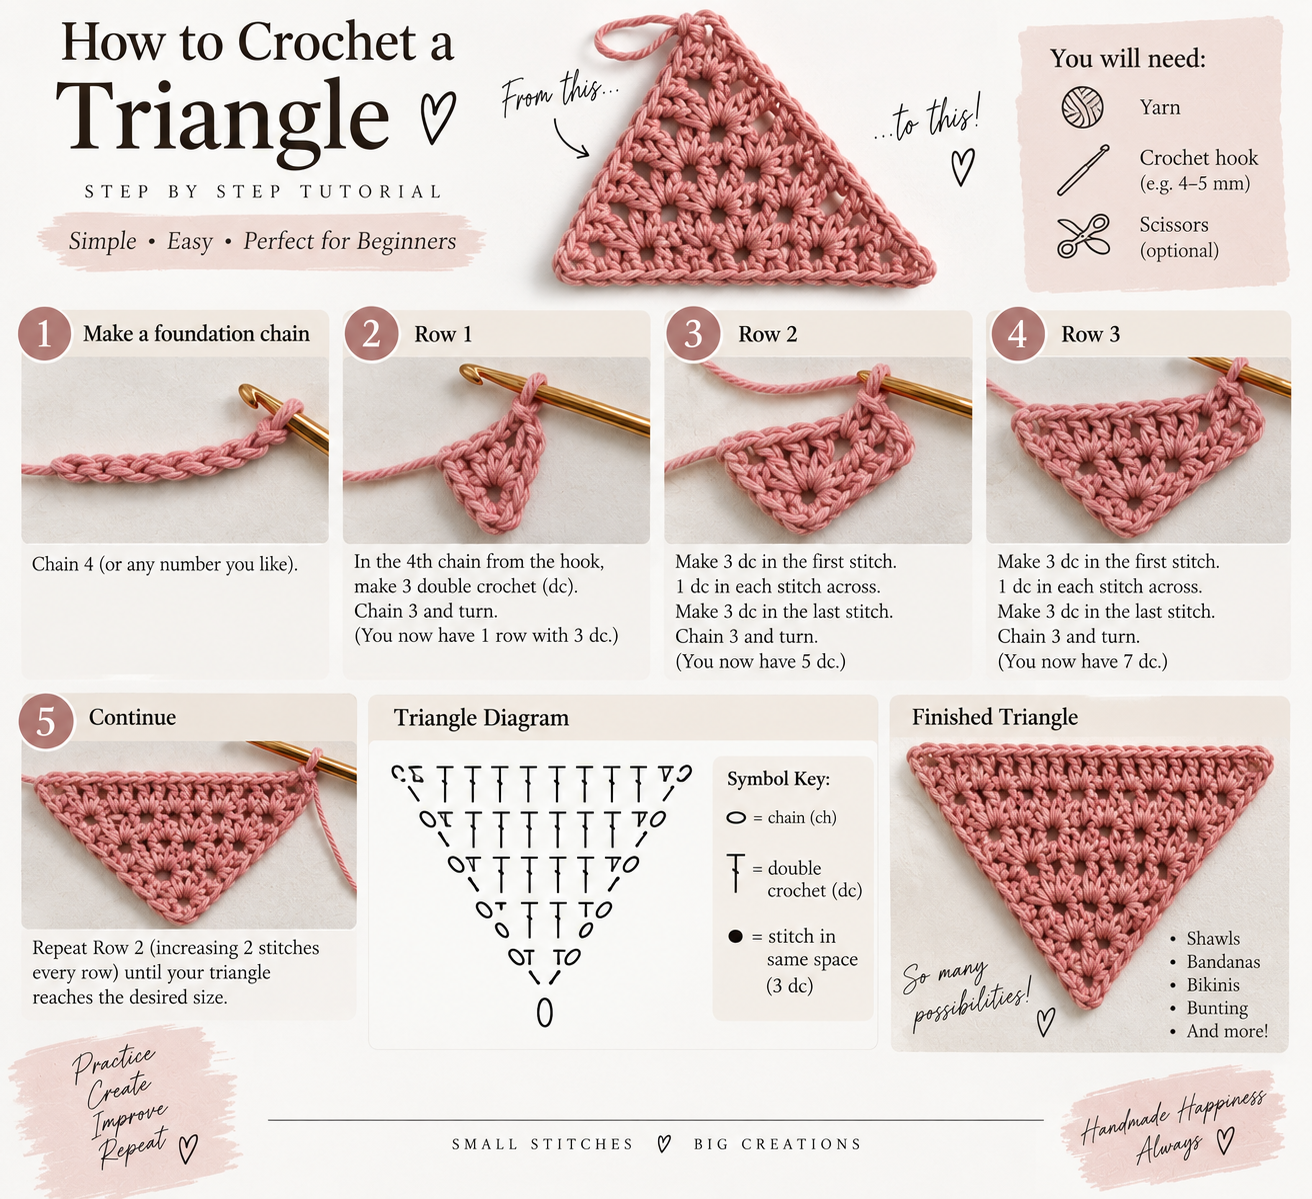
Our bandana begins from the top-center apex and grows downward and outward on both sides symmetrically. You can begin either with a Magic Ring or a simple Chain-4 Ring.
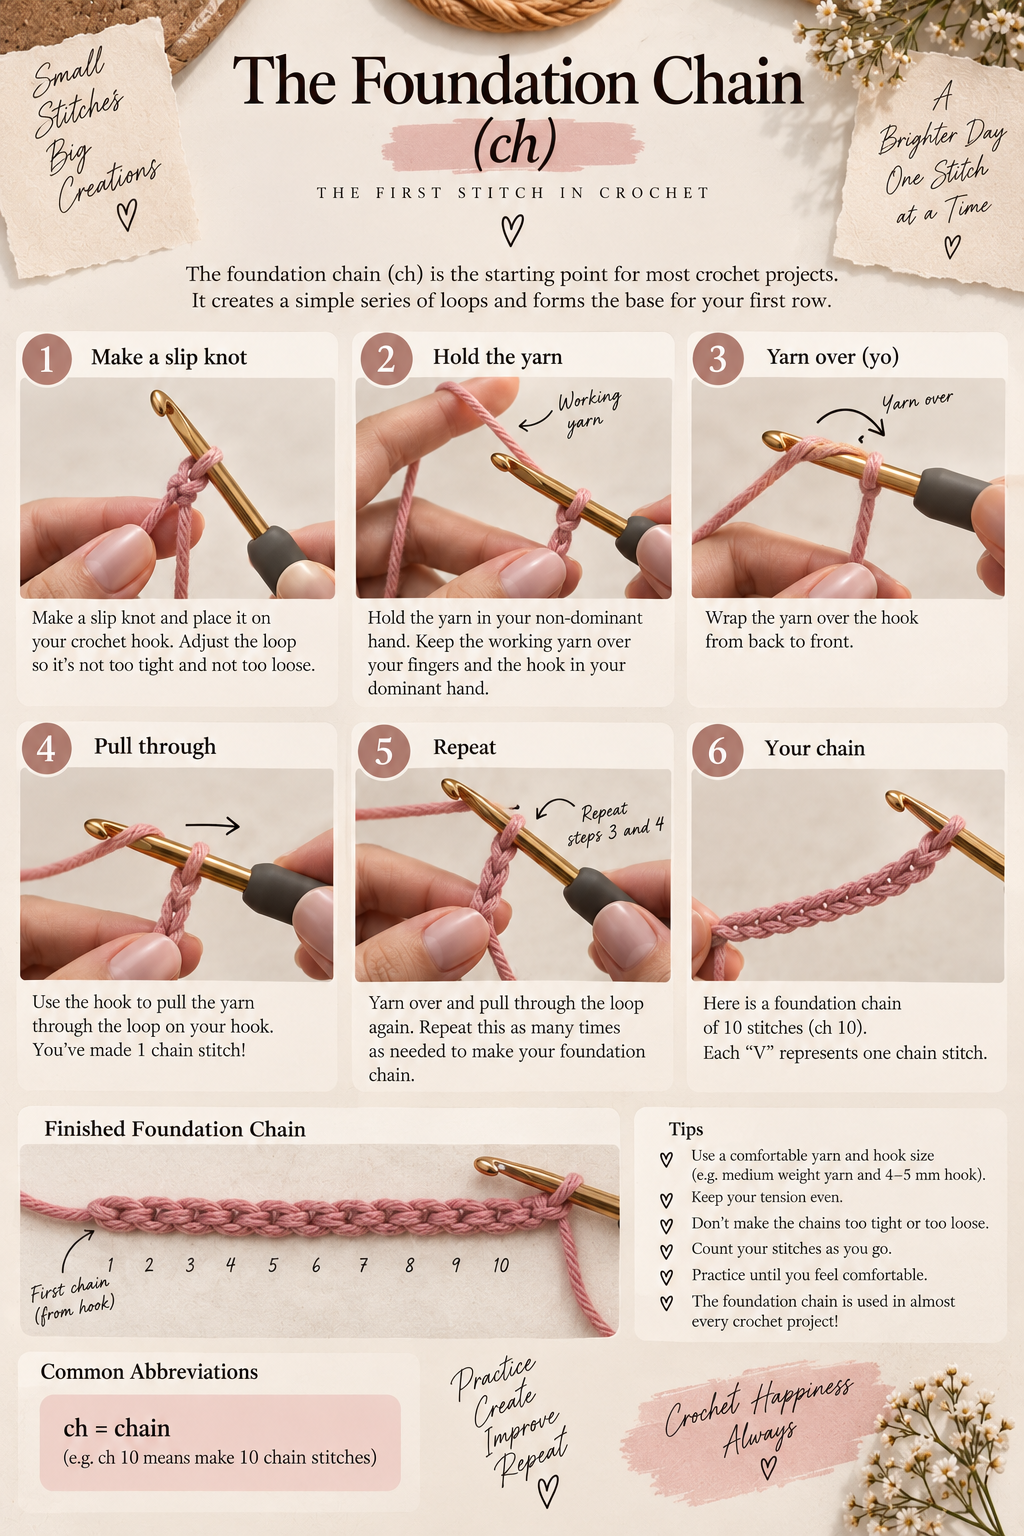
Foundation Row Pattern:
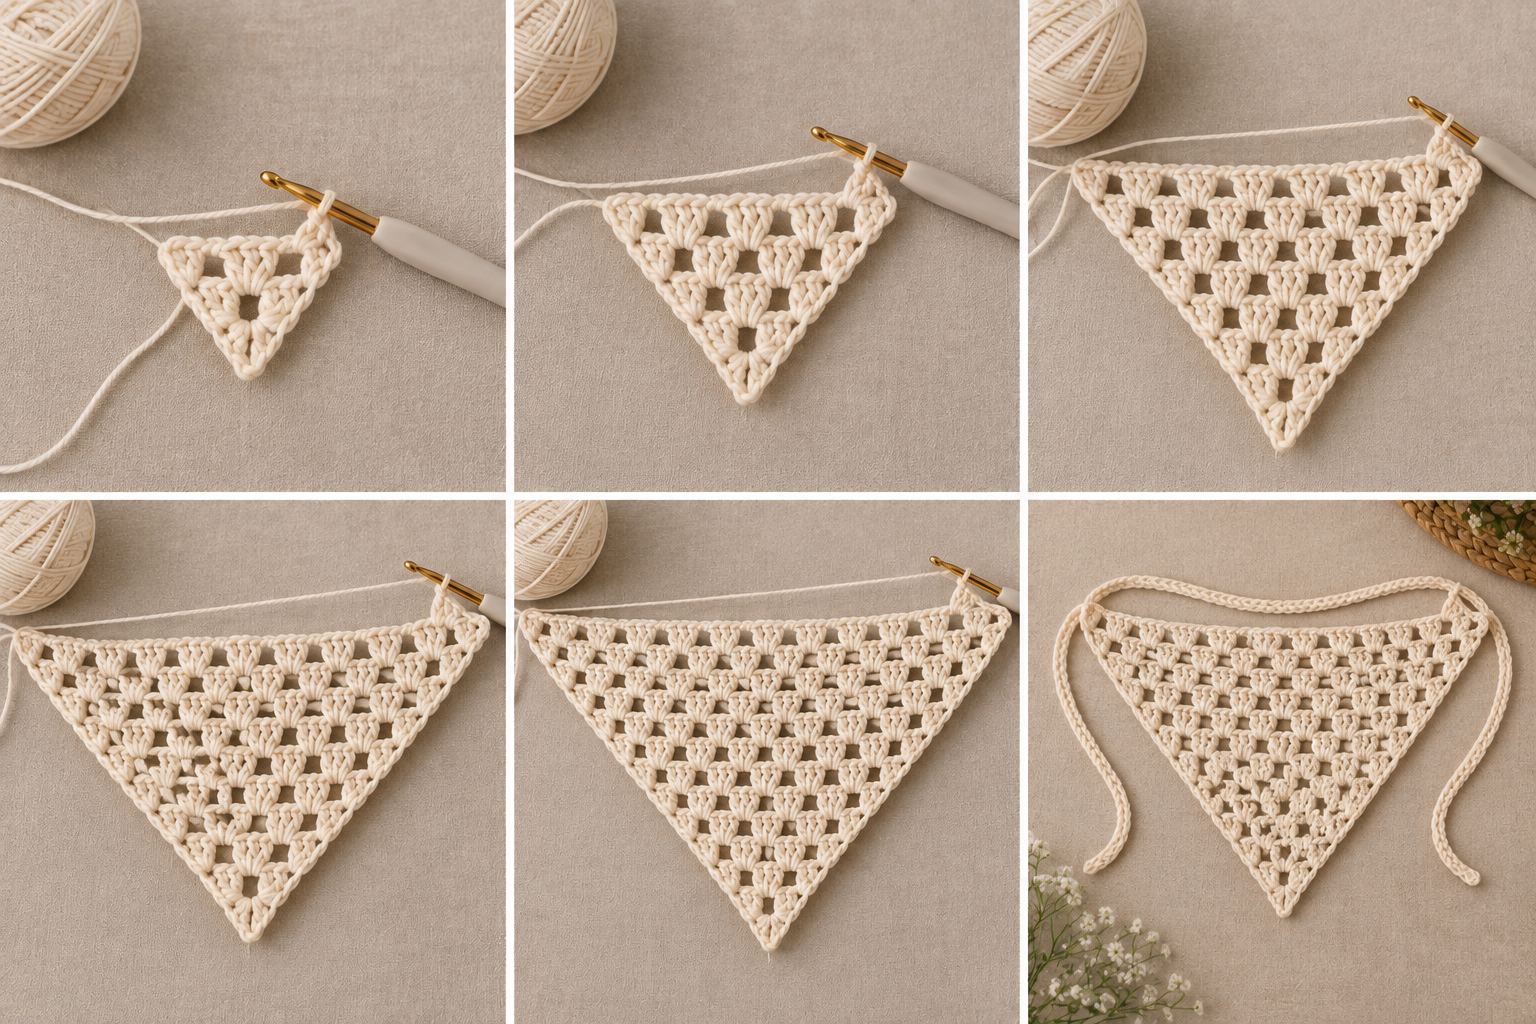
Row 1: Make a Magic Ring (or Ch 4 and Sl St into the first chain to form a ring). Ch 4 (counts as 1 DC + Ch 1), work 3 DC into the ring, Ch 2 (this creates your center triangle point), work 3 DC into the ring, Ch 1, 1 DC into the ring. Gently pull the magic tail to close the center circle. Turn. [Total: 8 DC, 2 Ch-1 spaces, 1 center Ch-2 space]
Forming the Triangle Shape
In Row 2, you will begin forming the distinct triangular wings. The secret to perfect symmetry lies in working standard 3-DC clusters along the flat edges and placing a special increase cluster `(3 DC, Ch 2, 3 DC)` right into the center corner space.
Row 2 Pattern:
Row 2: Ch 4 (counts as DC + Ch 1), turn. Work 3 DC into the first Ch-1 space. Ch 1. In the center Ch-2 corner point, work (3 DC, Ch 2, 3 DC). Ch 1. Work 3 DC into the final Ch-1 turning space, Ch 1, 1 DC into the 3rd chain of the beginning turning chain. Turn.
Continue Increasing Rows
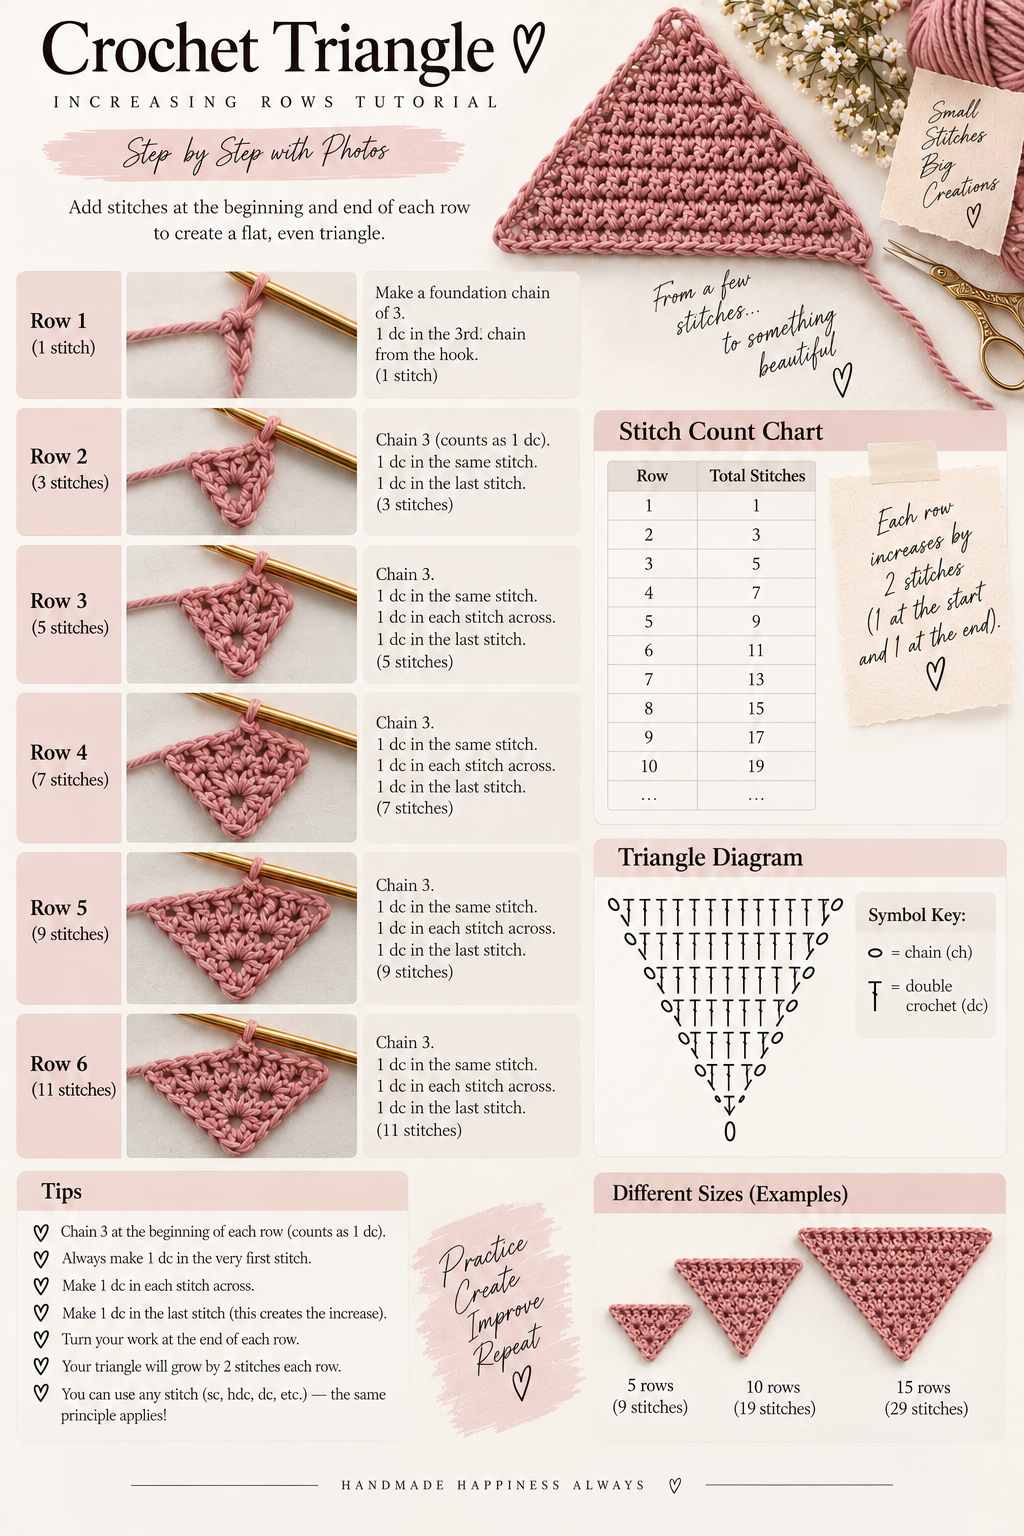
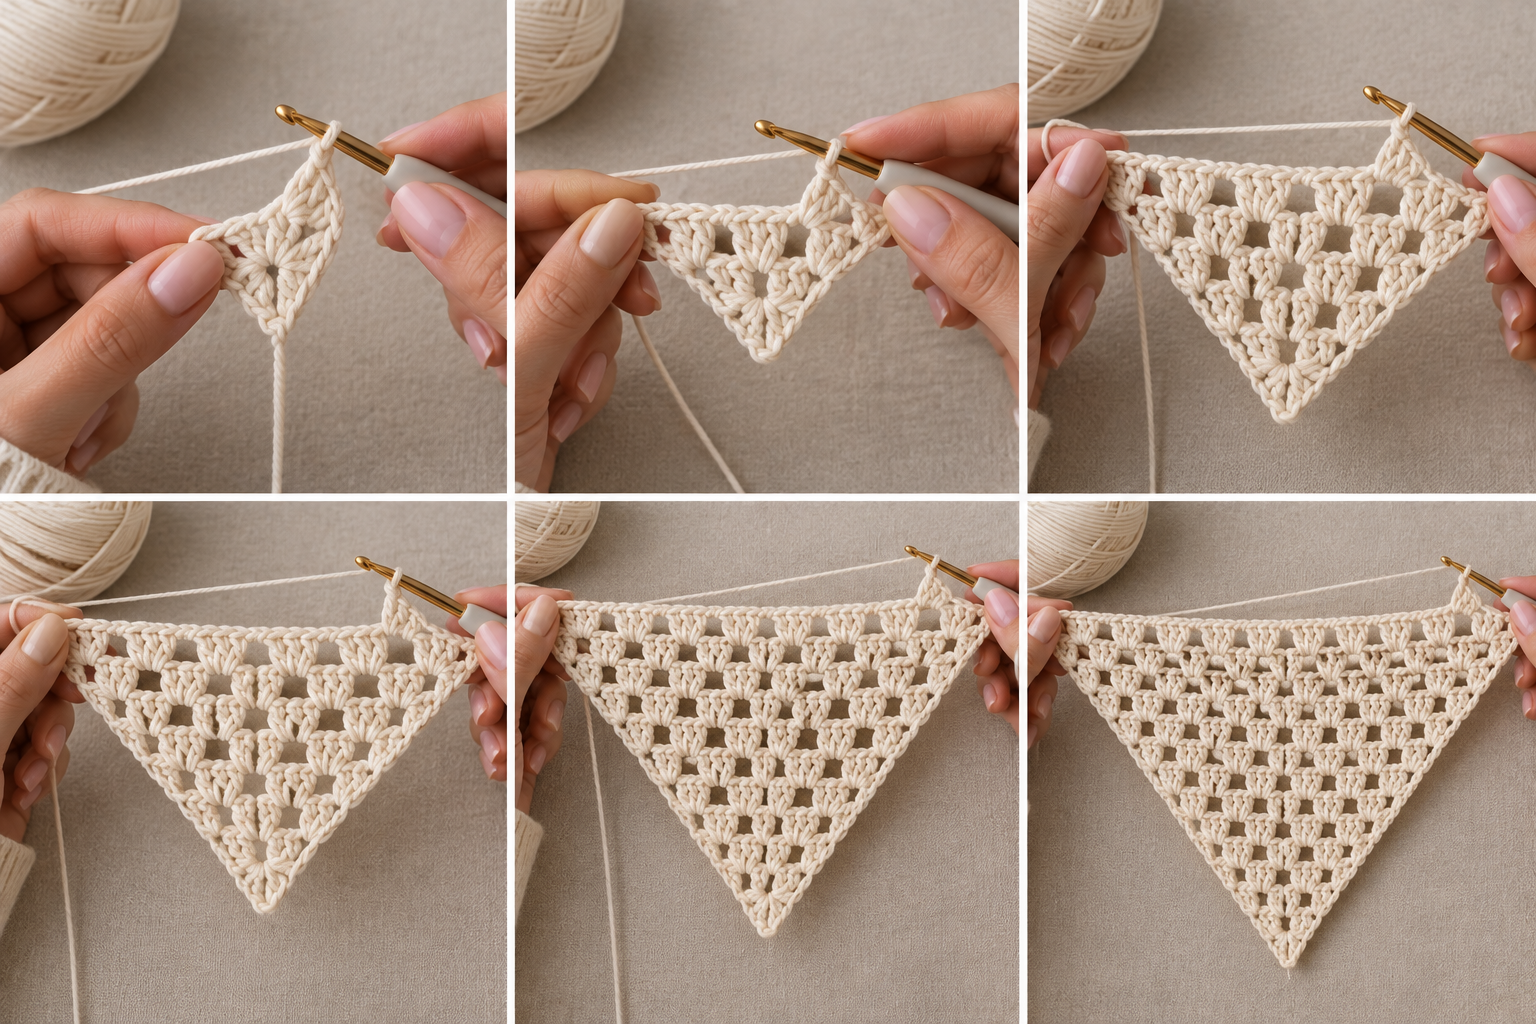
Now comes the soothing rhythm of the project! You will simply repeat the established increase sequence for each subsequent row until the bandana reaches your desired wingspan and coverage depth.
General Row Repeat (Rows 3 through 15):
Repeat Row: Ch 4, turn. Work 3 DC into the first Ch-1 space. *Ch 1, 3 DC in next Ch-1 space; repeat from * to the center point. In center Ch-2 space, work (3 DC, Ch 2, 3 DC). *Ch 1, 3 DC in next Ch-1 space; repeat from * to end Ch-1 space. In the last space, work 3 DC, Ch 1, 1 DC into the turning chain. Turn.
Add the Bandana Ties
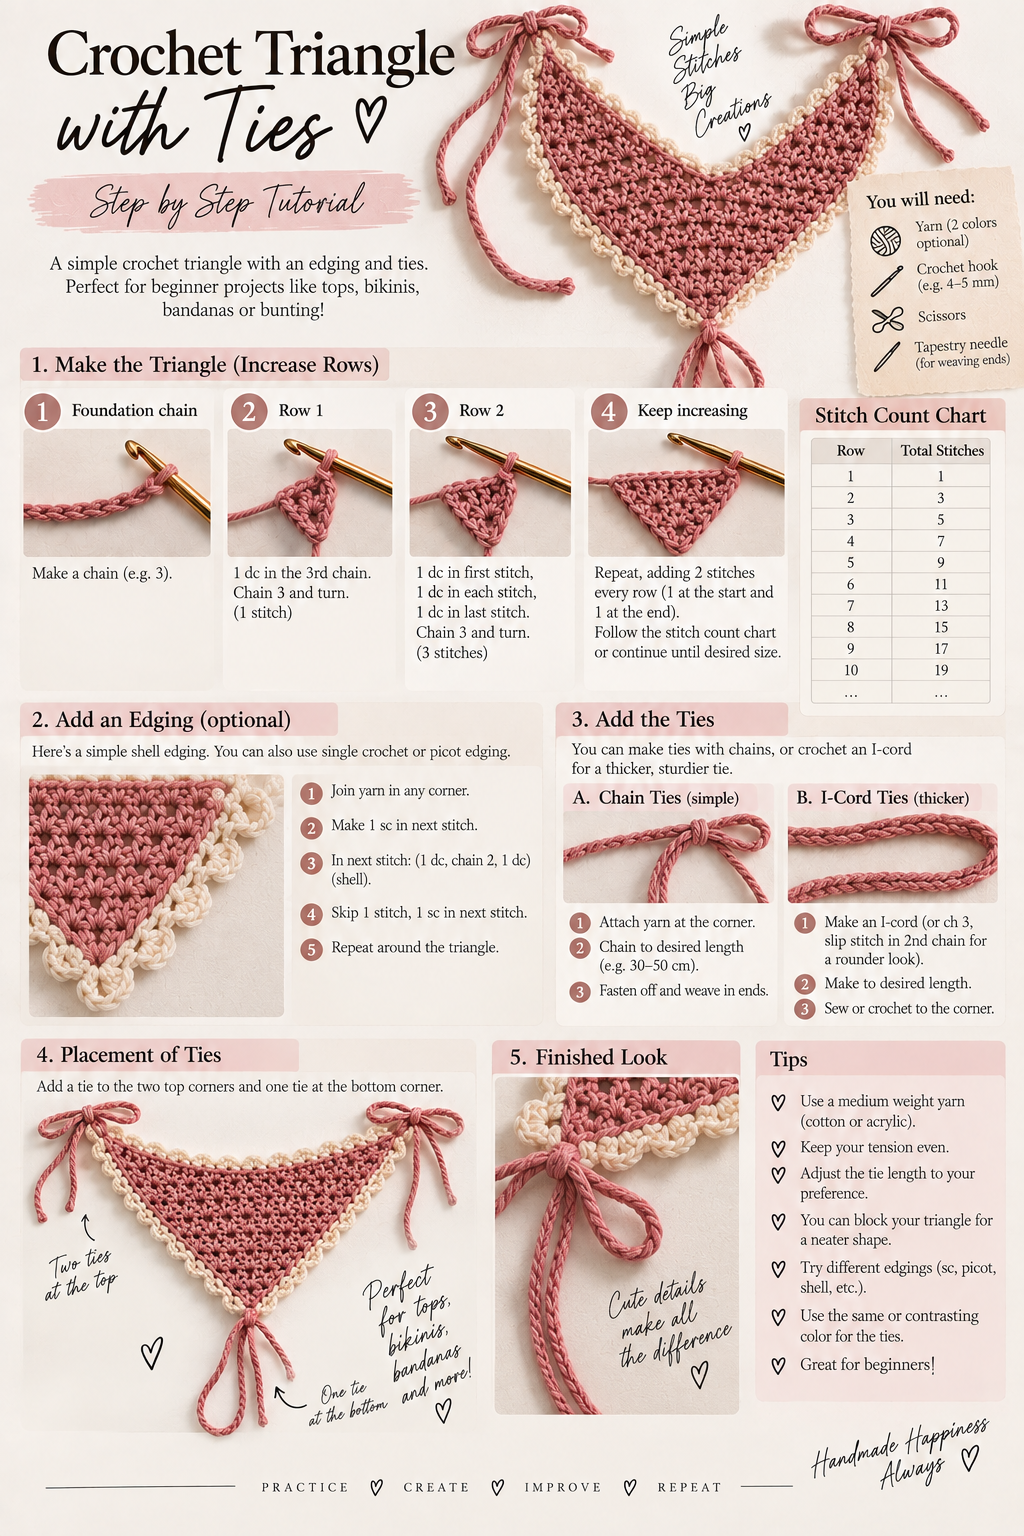
To ensure your bandana stays comfortably in place without slipping or requiring hairpins, we crochet continuous reinforced corner ties directly off the top wings.
How to Crochet Seamless Ties:
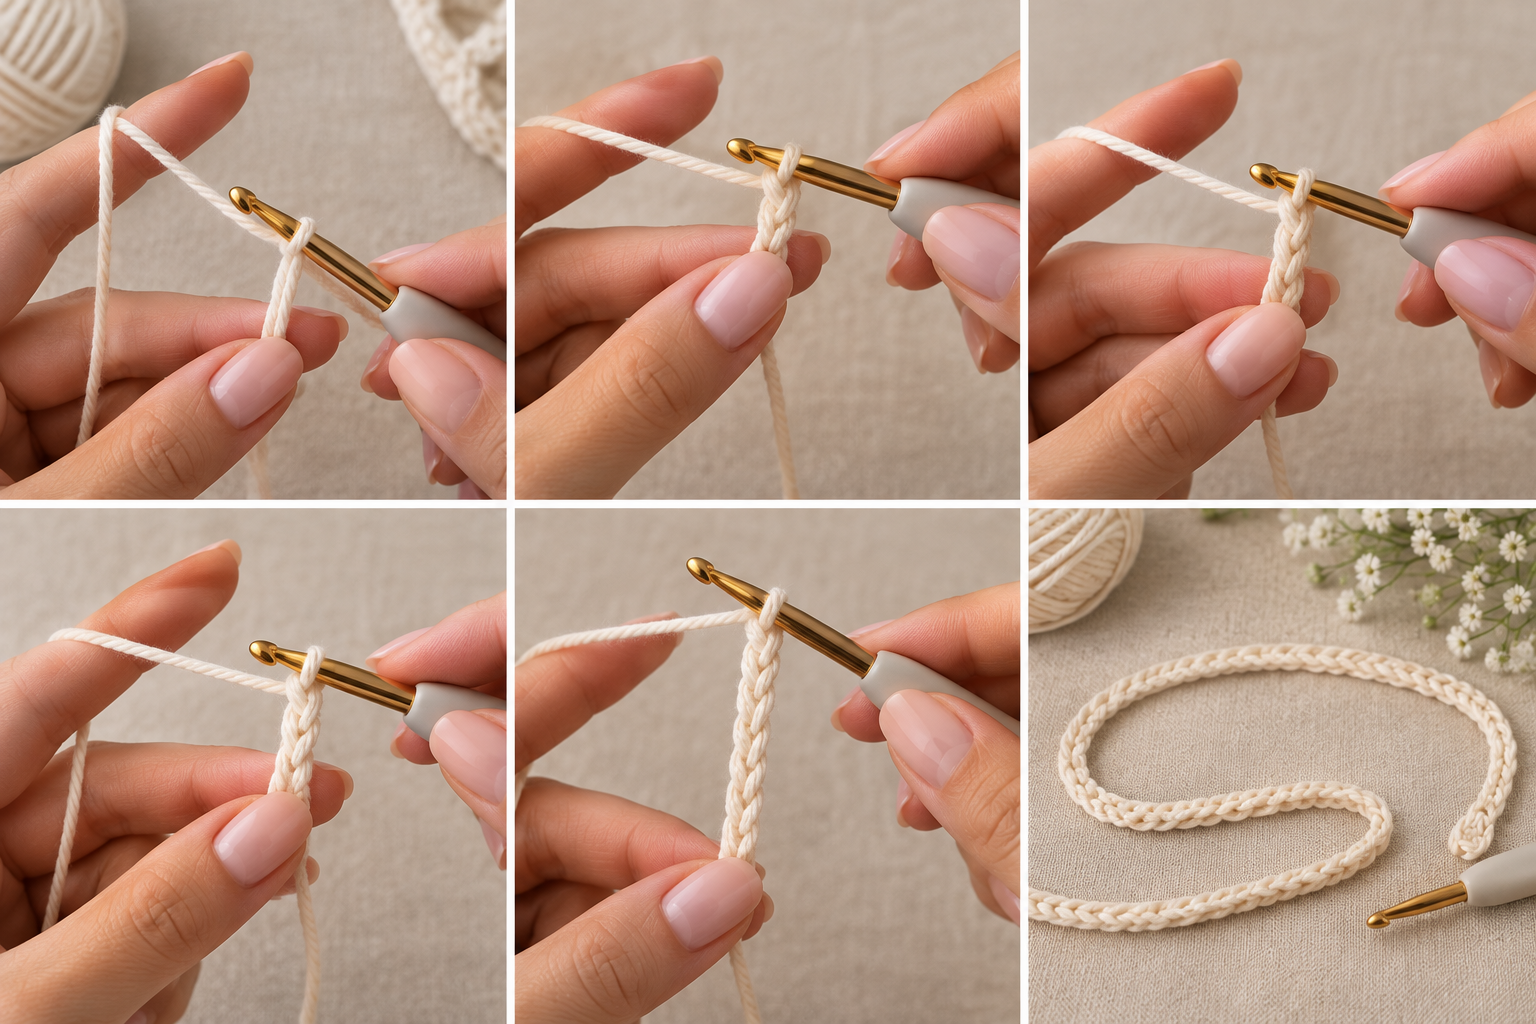
- Do not fasten off at the end of your final triangle row. Chain 50 to 60 stitches (approx. 10 to 12 inches of tie length).
- Turn and slip stitch (or single crochet) into the 2nd chain from hook and in each chain back toward the bandana corner.
- Evenly single crochet across the entire top edge of the bandana to the opposite corner.
- At the opposite corner, chain 50 to 60 stitches, turn, and slip stitch in each chain back to the corner. Fasten off and weave in the tail.
Add Decorative Edging & Blocking
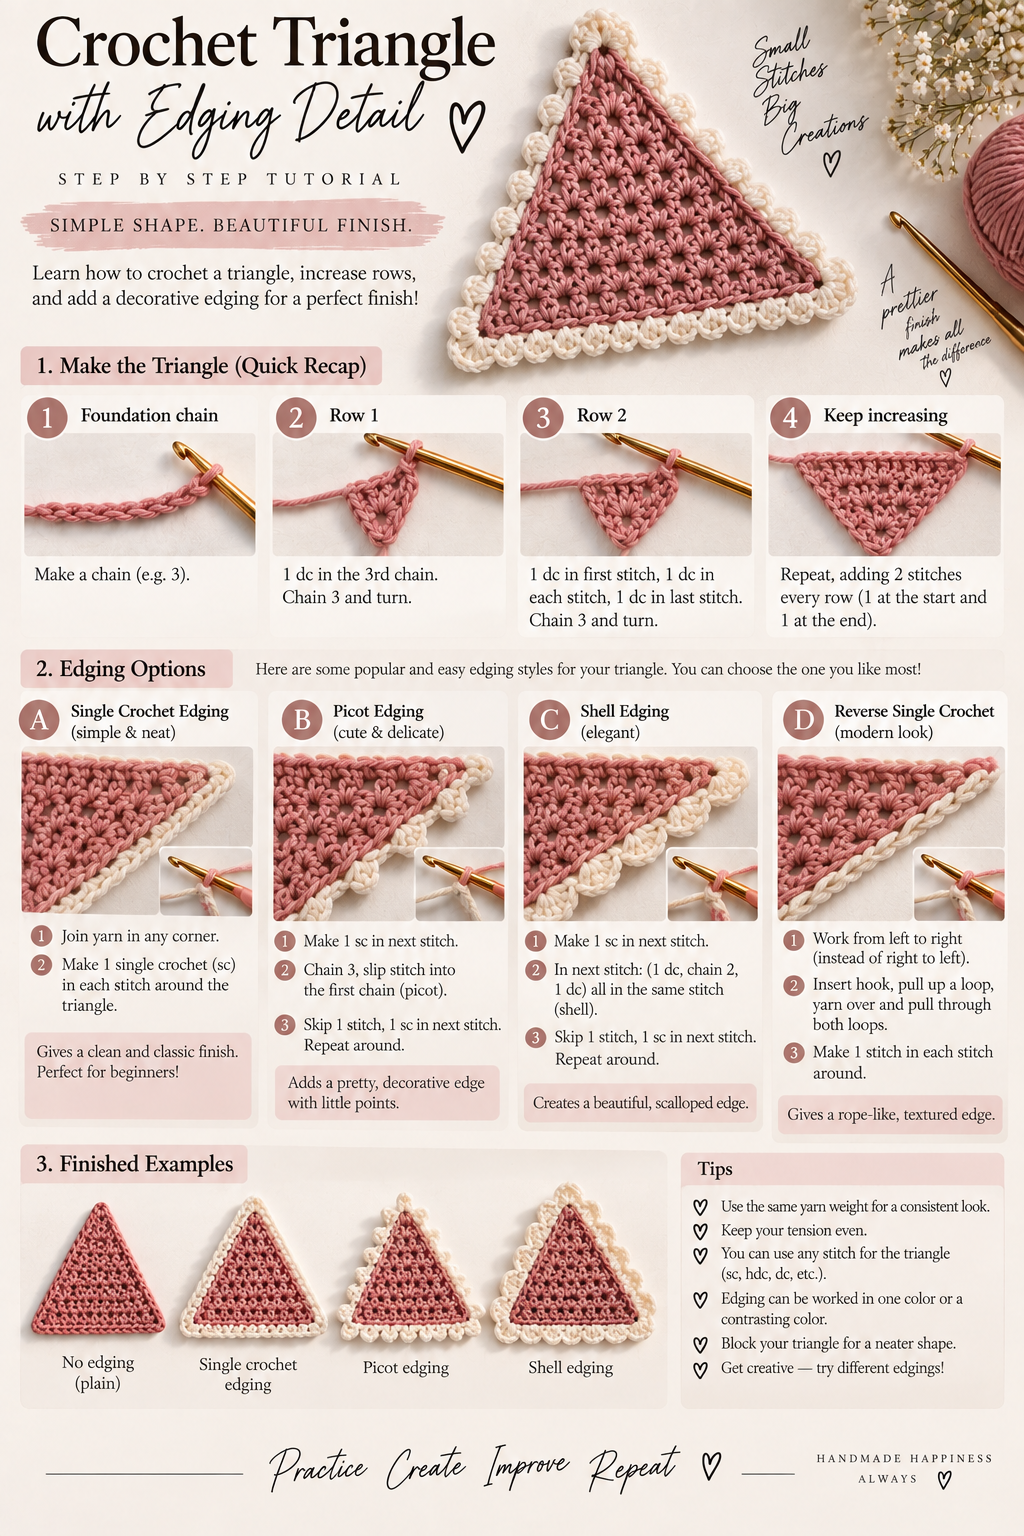
A delicate border elevates your handmade bandana into a boutique-quality showpiece. You can opt for a clean minimalist single-crochet border or a romantic vintage scallop/picot lace trim.
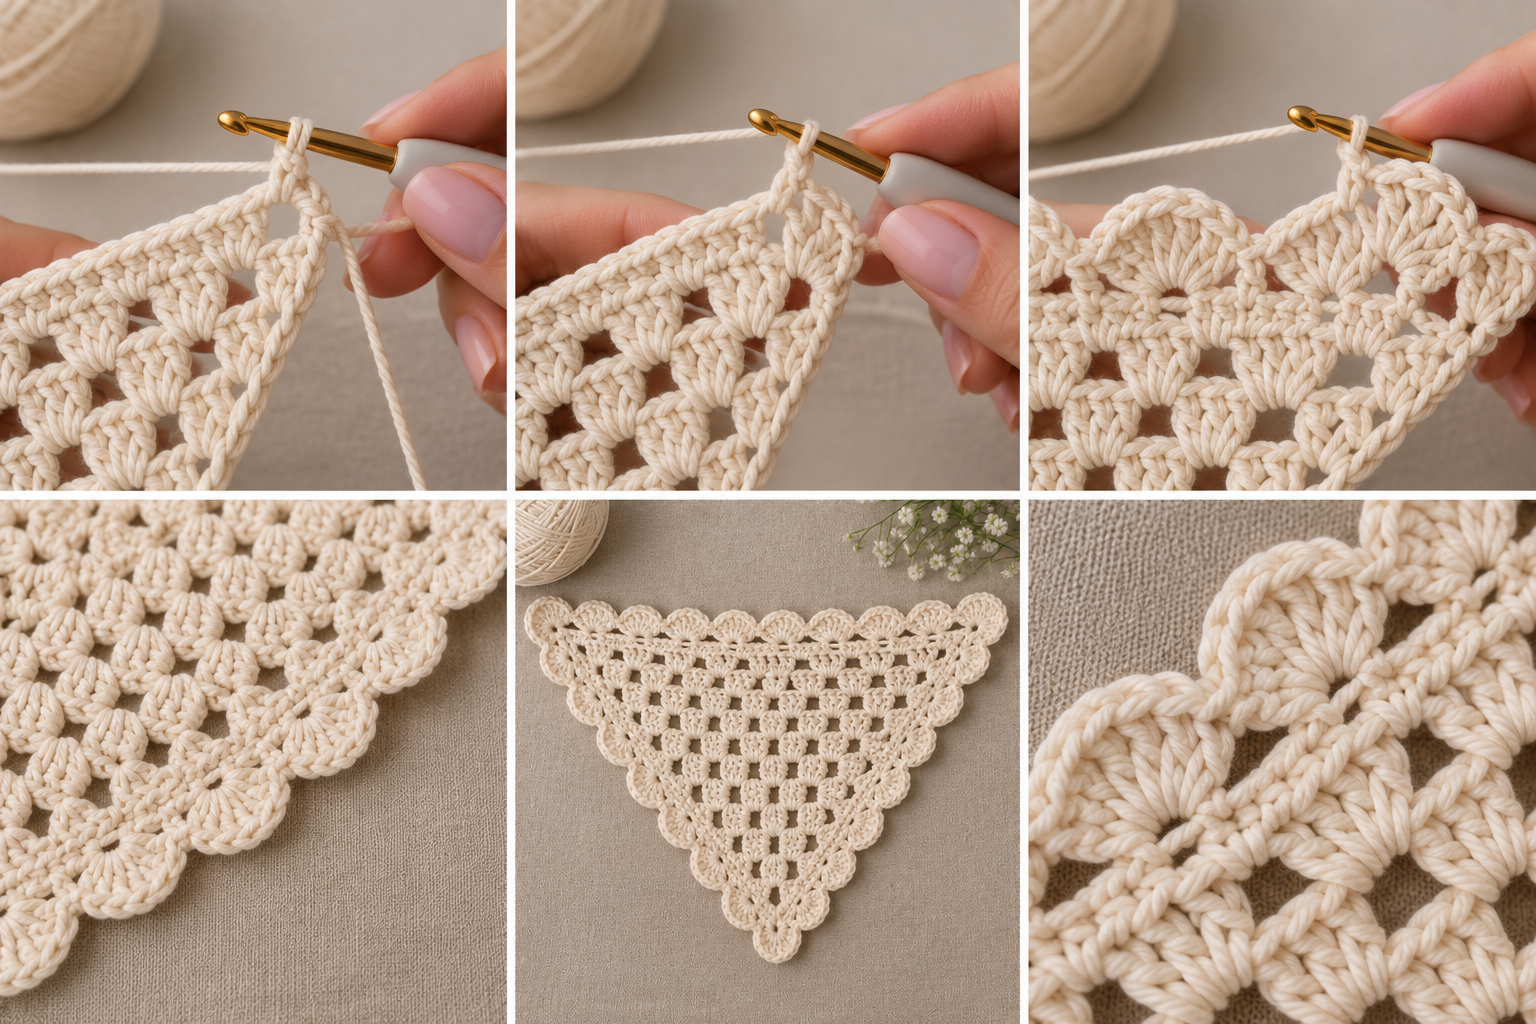
🌸 Scallop Shell Border Option
Along the two diagonal edges, work *1 SC in first stitch, skip 1 stitch, 5 DC in next stitch, skip 1 stitch; repeat from * down each side to create delicate scalloped fans.
💧 Wet Blocking for Crisp Drape
Submerge your finished bandana in lukewarm water for 15 minutes, gently roll in a towel to remove excess water, and pin out the points on blocking mats until fully dry.
✨ How to Style Your Crochet Bandana
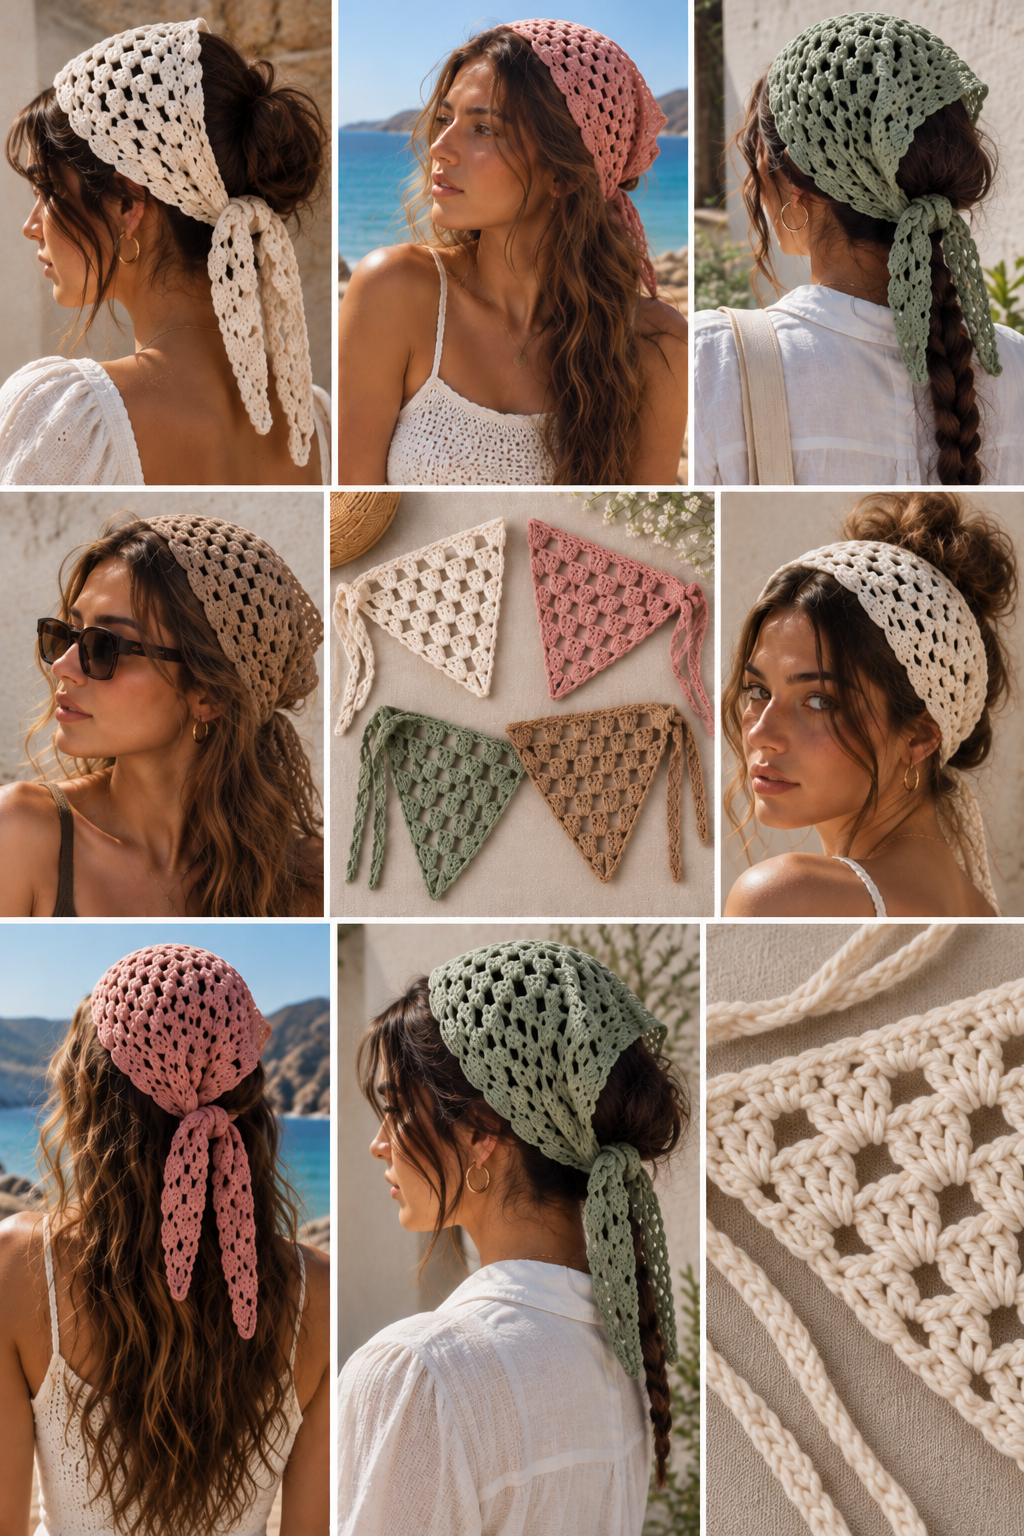
Crochet bandanas are among the most versatile fashion accessories in your handmade wardrobe. Here are four gorgeous ways to style your finished kerchief:
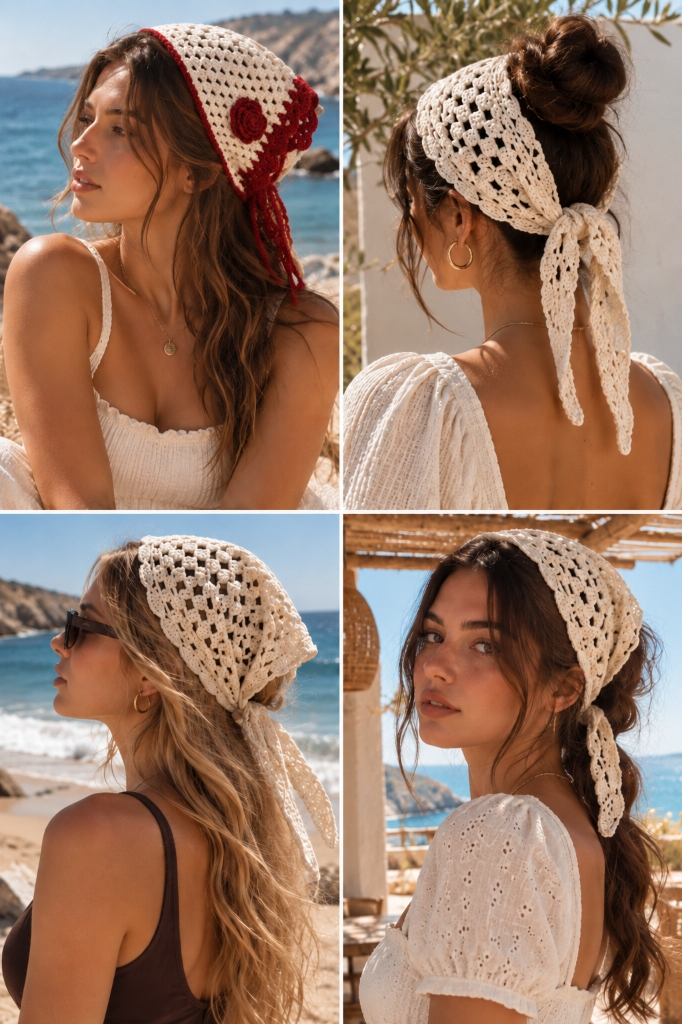
Beach & Coastal Chic
Wear it loosely over beach waves with oversized sunglasses and an unbuttoned oversized linen shirt.
Casual Everyday Bun
Tie the straps securely under a high messy topknot or messy bun with relaxed denim and a white tee.
Cottagecore Romance
Pair with puff-sleeve sundresses, floral embroidery, woven wicker market baskets, and knit cardigans.
Boho Festival Look
Tie retro-style under your chin or across the forehead as a statement headband with layered brass jewelry.
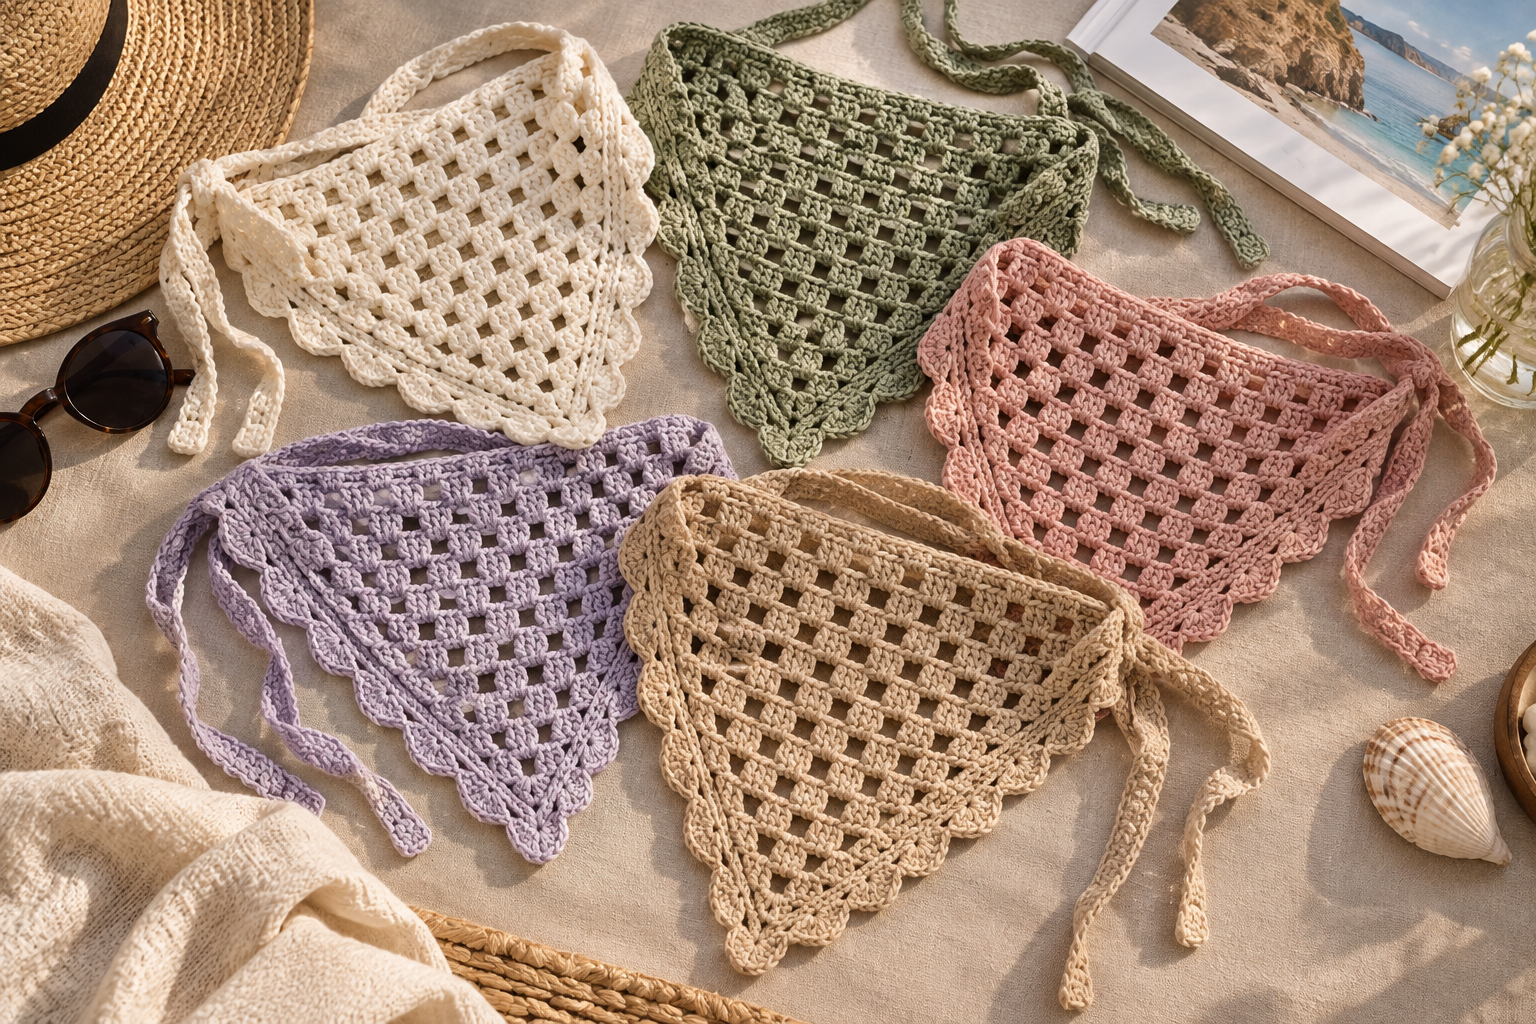
📸 Step-by-Step Hands-on Photo Gallery
Follow along with these high-resolution step photos to see every detail of the stitch placement, center spine formation, and edge finishing:
💡 Pro Tips for Bandana Success & Common Mistakes
🌟 Beginner Tips:
- Place a Marker at the Apex: Clip a locking stitch marker in the center Ch-2 space to never lose your increase point.
- Relax Your Tension: Keep your double crochets tall and loose so the fabric drapes naturally over your head.
- Count Clusters Every 2 Rows: Each row should contain exactly 2 more 3-DC clusters than the previous row (1 per side).
- Wet Block Your Cotton: Blocking opens up the granny stitch eyelets and eliminates curled edges completely.
⚠️ Common Mistakes to Avoid:
- Missing the End Stitch: Always work the final DC into the top of the turning chain, otherwise the top edge will slant unevenly.
- Tight Foundation Knot: If your magic ring is pulled too tightly before row 2, the center point can pucker.
- Stiff Ties: Avoid bulky double-crochet ties, as they will create uncomfortable pressure points behind the ears.
❓ Frequently Asked Questions
How long does it take to crochet a bandana?
Most crocheters can finish a complete triangle bandana in 2 to 4 hours. Because it uses repetitive granny clusters and lightweight yarn, it is one of the fastest wearable accessories to make.
What yarn works best for a crochet bandana?
Lightweight 100% mercerized cotton (such as Lion Brand 24/7 Cotton or Scheepjes Catona) or a cotton-bamboo blend works best. Cotton is breathable, hypoallergenic, and provides crisp stitch definition without overheating your hair.
Can beginners make this pattern?
Absolutely! This pattern only requires basic beginner stitches: the foundation chain, single crochet, double crochet, and slip stitch. The simple 1-row repeating rhythm makes it exceptionally forgiving.
Can I sell bandanas made from this tutorial?
Yes! You are welcome to sell finished handmade items created from this free tutorial in your Etsy shop, local craft markets, or boutique stalls. A small credit back to Loop & Blossom is always appreciated.
How do I wash and care for my crochet bandana?
Hand wash your bandana in cool water using mild detergent. Gently squeeze out excess water in a clean dry towel (do not wring or twist), reshape the triangle points, and lay flat to air dry.
📌 Save This Crochet Bandana Tutorial for Later!
Love this free pattern? Pin it to your favorite Crochet Accessories or Summer DIY Projects board on Pinterest so you can find it whenever you are ready to craft!
🌸 More Free Patterns You’ll Love
🛒 Materials Used in This Project
Tested & Recommended
Here are the exact notions, yarns, and tools used to crochet the sample bandana featured in this tutorial. Clicking any product button below directs you to Amazon: