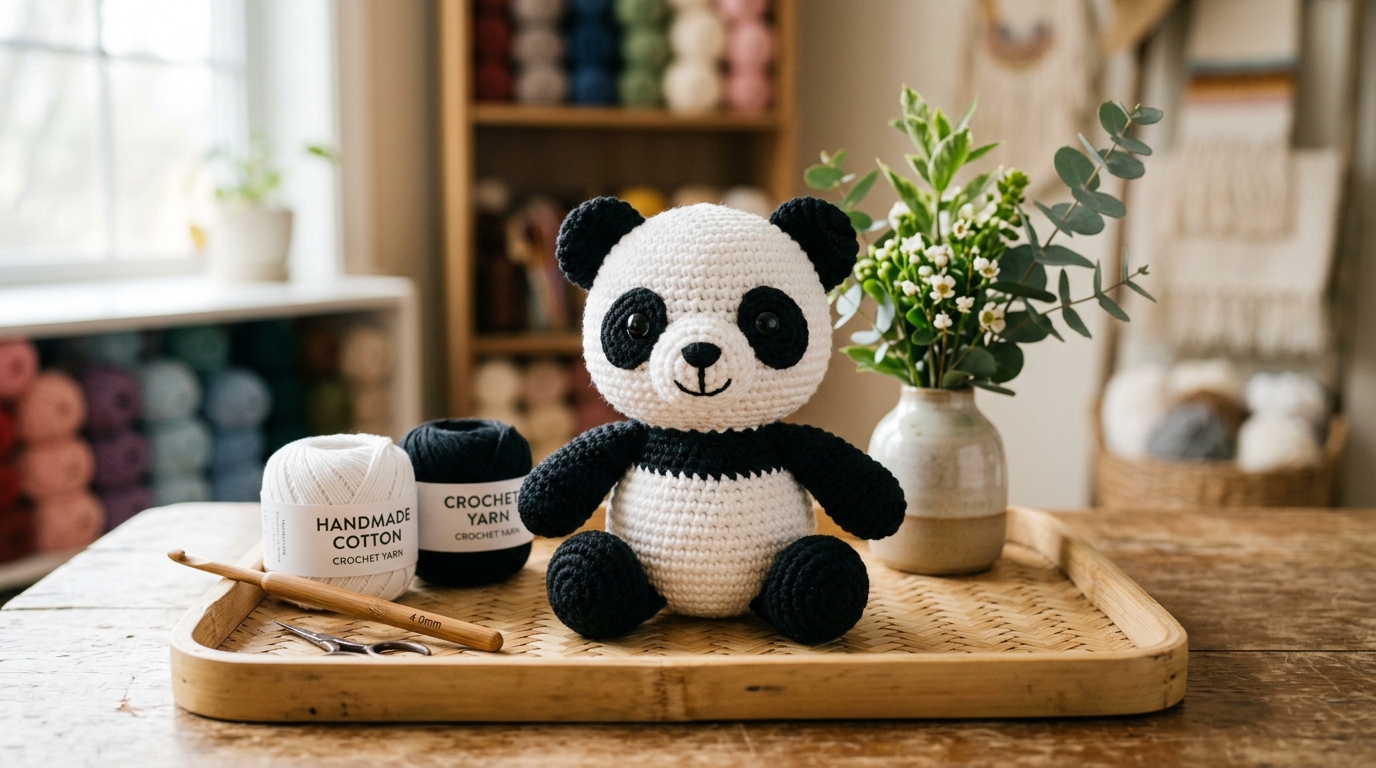
Free No-Sew Crochet Panda Pattern: Cute Mini Amigurumi Tutorial

If you love making adorable crochet animals but want to skip the tedious chore of sewing tiny ears, paws, and legs together, this free no-sew crochet panda pattern is the perfect project for you! Designed with clever bobble stitches and smooth color transitions, this mini panda is crocheted seamlessly in one continuous piece from ears down to the paws in under 45 minutes.
📋 Pattern Specs & Quick Overview
- Skill Level: Advanced Beginner (Requires comfort with single crochet, magic ring, color changes, and 5-dc bobble stitches).
- Finished Size: Approximately 3.5 inches (9 cm) tall using worsted cotton and a 3.0mm hook.
- Crafting Time: 35 to 50 minutes from cast-on to final cinch.
- Sewing Required: Zero! The ears, arms, and legs are crocheted directly into the body. You only use a needle once at the end to close the bottom 6 stitches.
Materials and Tools Needed
To make this cute no-sew panda, gather the following supplies:
- White Yarn (Main Head & Body): 25g of Category 4 Worsted Weight 100% Mercerized Cotton (or soft acrylic/chenille).
- Black Yarn (Ears, Eye Patches, Arms & Legs): 20g of matching Worsted Weight Cotton.
- Crochet Hook: 2.75mm (US C/2) or 3.0mm ergonomic hook. Choosing a smaller hook ensures your stitches stay tight and dense so white stuffing never peeks through the black stitches.
- Safety Eyes: One pair of 8mm or 9mm black plastic craft safety eyes with secure locking washers.
- Stuffing: Premium polyester fiberfill (Poly-Fil).
- Embroidery Floss: A 12-inch strand of black thread for the cute muzzle smile and pink yarn for cheek blushes.
- Notions: Locking stitch marker, blunt tapestry needle, and scissors.
💡 Where to buy: You’ll find all the useful links to buy these exact supplies from Amazon at the bottom of this article.
Special Techniques Explained
Before diving in, here are the two core techniques that make this pattern 100% seamless:
1. The Ear & Limb Bobble Stitch (5-dc Bobble):
To create cute rounded 3D ears and paws without sewing: [Yarn over, insert hook into designated stitch, yarn over, pull up a loop, yarn over, pull through 2 loops] repeat 5 times into the exact same stitch (you will have 6 loops on your hook). Yarn over and pull through all 6 loops. Push the rounded bubble outward toward the front of your work so it pops into a round ear or paw.
2. Seamless Color Changes:
When switching from White to Black (or Black to White), work the last single crochet of the old color until only 2 loops remain on your hook. Drop the old color, yarn over with the new color, and pull through both loops to complete the stitch. Carry unused yarn on the inside cavity.
Step-by-Step No-Sew Panda Tutorial
The entire panda is worked in continuous unjoined spiral rounds from the top of the head down to the base. Use your stitch marker to mark the first stitch of every round.
Part 1: The Head & Seamless Ears (Rounds 1–6)
Round 1 — Magic Ring Foundation (In White Yarn):
Start with White yarn. Create an adjustable magic ring, work 6 single crochet stitches into the ring, and pull the tail firmly to cinch the circle tightly shut. Place your stitch marker in the 6th stitch. (Total: 6 stitches)
Round 2 — Expanding the Crown (All Increases):
Work 2 single crochets into every single stitch around the circle. (Total: 12 stitches)
Round 3 — 1 Single Crochet, 1 Increase Pattern:
Work 1 single crochet in the first stitch, then work 2 single crochets (an increase) in the next stitch. Repeat this sequence (1 single crochet, 1 increase) 6 times around. (Total: 18 stitches)
Round 4 — 2 Single Crochets, 1 Increase Pattern:
Work 1 single crochet into each of the next 2 stitches, then work an increase in the 3rd stitch. Repeat this sequence 6 times around. (Total: 24 stitches)
Round 5 — The Seamless Ear Round:
Now we form the black rounded ears directly into the head round! Work 1 single crochet in each of the next 4 stitches with White. In the 5th stitch, join Black yarn and work a 5-dc Bobble Stitch (this is Ear #1). Switch back to White and work 1 single crochet in each of the next 6 stitches across the forehead. In the next stitch, switch to Black yarn and work a 5-dc Bobble Stitch (Ear #2). Switch back to White and work 1 single crochet in the remaining 12 stitches around. Pop both black ear bobbles outward. (Total: 24 stitches)
Rounds 6 to 9 — Building the Head & Face (In White Yarn):
For the next 4 rounds, simply work 1 single crochet into every stitch around using White yarn. (Total: 24 stitches per round)
Part 2: Eye Patches & Facial Embroidery
Eye Patches (Make 2 with Black Yarn):
With Black yarn: make a magic ring, work 1 single crochet, 1 half double crochet, 2 double crochets, 1 half double crochet, and 1 single crochet into the ring. Pull the loop snug to form a small oval patch. Fasten off with a short tail.
Insert the post of your 8mm safety eye through the center of each black patch. Then push the eye posts directly through the front of the panda face between Round 7 and Round 8, spaced approximately 5 stitches apart. Snap the locking washer backings firmly onto the posts inside the head cavity.
Muzzle Embroidery:
Thread your tapestry needle with black embroidery thread. Between the two eye patches on Round 8, stitch a small horizontal triangle for the panda nose, with one vertical straight stitch downward to create a sweet smile.
Part 3: The Black Vest & Seamless Arms (Rounds 10–13)
Round 10 — Switching to the Black Body Vest:
Switch completely to Black yarn. Work 1 single crochet in each of the 24 stitches around. (Total: 24 stitches)
Round 11 — The Seamless Front Arms Round:
Work 1 single crochet in each of the next 5 stitches. In the 6th stitch, work a 5-dc Bobble Stitch in Black (Arm #1). Work 1 single crochet in each of the next 6 stitches across the chest. In the next stitch, work a 5-dc Bobble Stitch (Arm #2). Work 1 single crochet in each of the remaining 11 stitches around. Pop both arm bobbles outward. (Total: 24 stitches)
Round 12 — Mid Vest:
Work 1 single crochet in each of the 24 stitches around using Black yarn. (Total: 24 stitches)
Round 13 — Switching Back to White Belly:
Switch to White yarn. Work 1 single crochet in each of the 24 stitches around. Now begin stuffing the head firmly with fiberfill, ensuring the cheeks are rounded and plump. (Total: 24 stitches)
Part 4: White Belly & Seamless Feet (Rounds 14–17)
Rounds 14 and 15 — The Lower Belly:
Work 1 single crochet in each of the 24 stitches around using White yarn for 2 rounds. (Total: 24 stitches per round)
Round 16 — The Seamless Haunch Feet Round:
Work 1 single crochet in each of the next 4 stitches with White. In the 5th stitch, join Black yarn and work a 5-dc Bobble Stitch (Foot #1). Switch back to White and work 1 single crochet in each of the next 6 stitches across the lower belly. In the next stitch, switch to Black yarn and work a 5-dc Bobble Stitch (Foot #2). Switch back to White and work 1 single crochet in the remaining 12 stitches. (Total: 24 stitches)
Round 17 — Decreasing and Closing:
Work (2 single crochets in White, then 1 invisible decrease) 6 times around. Pack final stuffing firmly into the belly. (Total: 18 stitches)
Round 18 — Final Cinch:
Work (1 single crochet, 1 invisible decrease) 6 times around (12 sts), followed by 6 invisible decreases (6 sts). Cut yarn leaving an 8-inch tail. Thread tail onto tapestry needle, weave through the front loops of the remaining 6 stitches, cinch tightly like a drawstring to close, and hide the tail inside the panda’s body!
Finished Panda Showcase & Next Projects
Congratulations! You have completed your very own palm-sized, no-sew crochet panda. With its chubby cheeks, contrast black eye patches, and seamless bobble limbs, this little companion makes a wonderful keychain charm, desk buddy, or craft fair best-seller.
If you enjoyed this seamless project, check out our other popular free patterns:
- 🐸 Free Cute No-Sew Tree Frog Pattern (35-Minute Project)
- 🐰 Easy Crochet Bunny Pattern for Beginners (Floppy Lop Ears)
- 🍓 Chubby Strawberry Cow Amigurumi Plushie Pattern
- 🧸 The Complete Beginner Guide to Amigurumi
📌 Save This Panda Pattern on Pinterest

🧶 Materials & Supplies Used in This Project
If you want to use the exact tested tools, hooks, and yarns featured throughout this tutorial, here are the direct Amazon links:
100% mercerized natural worsted cotton offering crisp stitch definition and zero splitting during tight amigurumi tension.
Ergonomic soft elastomer grip that eliminates hand fatigue and glides smoothly through black & white cotton.
Organizer kit with 8mm/9mm glossy black safety eyes and heavy-duty snap backing washers for plushies.
100% hypoallergenic polyester fiberfill that creates smooth, clump-free plushie shaping.
Snag-free locking clip markers essential for accurately tracking continuous spiral rounds.
Large-eye blunt needles with curved tips for effortless final round cinching and yarn tail hiding.